


Spot beams throw light far and narrow, so they suit highway scanning, towing on open roads, and long-distance search work. Flood beams spread wide and shallow, so they suit scene work, loading, and anything close to the vehicle. If your work genuinely needs both, run a combo fixture or wire spot and flood on separate circuits so you can switch between them. Mount either type carefully, since a poorly aimed beam creates glare instead of visibility.
TL;DR:
- Spot beams are best mounted high and centered on a vehicle to maximize their long-distance, narrow-focus reach.
- Flood lights should be mounted lower and aimed slightly downward to avoid glare and provide full coverage around the vehicle.
- Combining spot and flood optics into one fixture offers a compromise but typically sacrifices maximum range or spread when compared to dedicated lights.
- Prioritizing candela and beam angle over lumens is essential when selecting lights for long-distance use, as the focus affects how far the light will actually reach.
- For mixed tasks, pairing a forward-facing spot or combo fixture with side or rear flood pods provides effective coverage for both long-range visibility and close-in work.
What’s the difference between flood and spot lights?
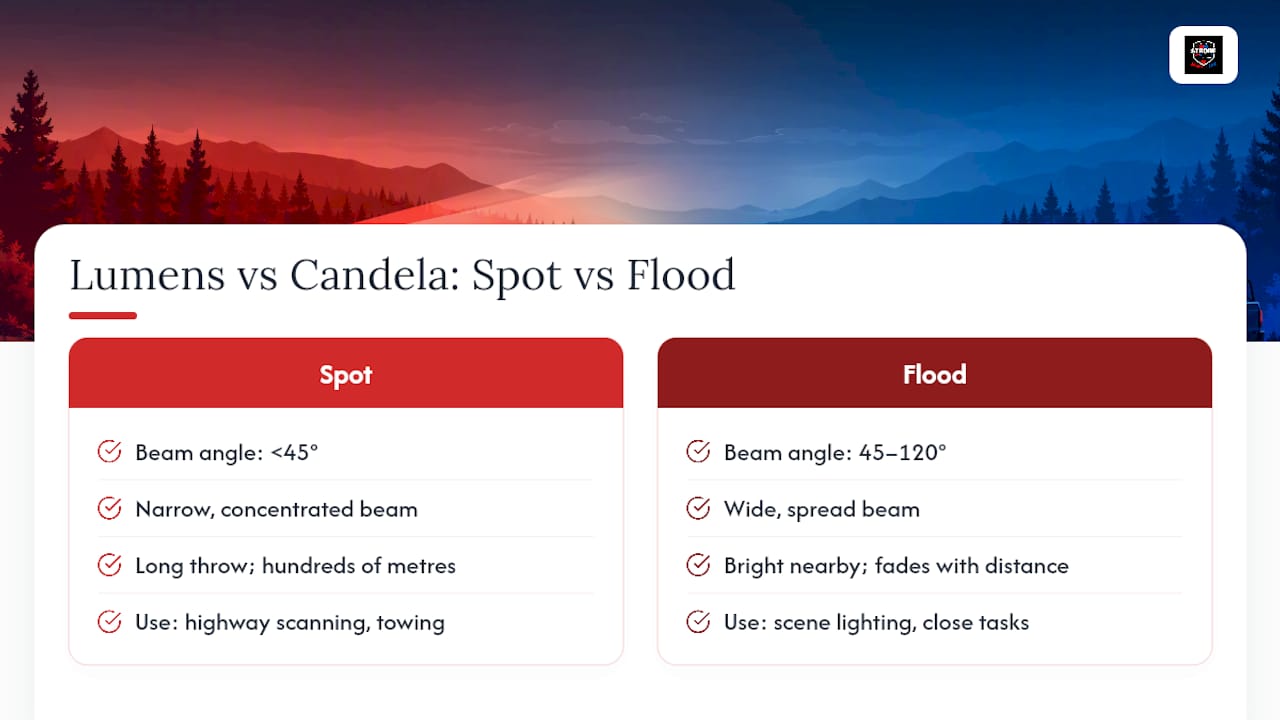
A spot beam concentrates light into a narrow cone, typically somewhere between 10 and 30 degrees, which is what lets it punch a usable pool of light hundreds of metres down a road or field. A flood beam does the opposite: it spreads light across a wide arc, generally 45 to 120 degrees, sacrificing distance for coverage. That trade-off between throw and spread is the entire story behind flood vs spot light selection, and it’s why the two beam patterns are never really interchangeable.
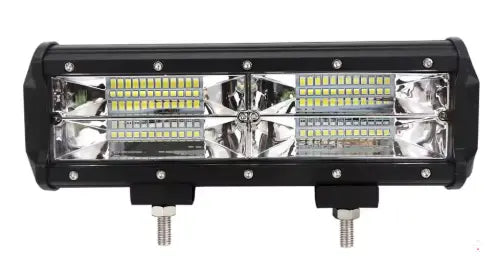
Combo beams sit between the two. Manufacturers build them by mixing spot and flood optics inside a single housing, either through split lens zones or alternating LED rows, aiming for a pattern that does a bit of both. Some product lines add driving or fog patterns, which are narrower flood variants tuned to stay low and wide without climbing into oncoming drivers’ eyes.
A few terms worth knowing before you read spec sheets:
- Hot spot: the brightest, most concentrated part of a spot beam’s pattern.
- Spill: the dimmer light around the hot spot, often what a flood beam relies on entirely.
- Beam angle: the measurement, in degrees, of how wide a fixture’s light spreads before it drops off.
How do you read lumens, candela, and beam angle correctly?
Lumens measure total light output. Candela measures intensity in a specific direction. That distinction matters more than most buyers realize, because lumens alone can’t tell you how far a light will actually reach. Two lights rated at the same lumen count can behave completely differently on the road if one spreads that output over 100 degrees and the other concentrates it into 15.
The intuition is straightforward: the narrower the beam angle, the more concentrated the candela, and the farther the light throws. A flood light rated at 20,000 candela spread across 90 degrees will look bright up close and fade fast at distance. A spot light with the same candela rating concentrated into 15 degrees will still be usable at several hundred metres.
Statistic Callout: Retail lighting guides commonly classify beam angles under 45 degrees as spot patterns and 45 to 120 degrees as flood patterns, with the actual lens and reflector design, not just LED wattage, determining where a fixture lands in that range.
For highway scanning or long-distance towing work, prioritize candela and beam angle over raw lumens. For scene lighting or close-in tasks, total lumen output across a wide angle matters more than throw.
Which vehicle tasks call for spot vs flood beams?
Matching pattern to task is where most buyers either save themselves money or end up returning a fixture that never fit the job.
- Open-road towing and highway recovery. A spot beam mounted forward lets you scan the shoulder or a dark stretch of highway well ahead of your stopping distance.
- High-speed off-road or long-distance search. Spot patterns hold their usefulness at speed because the beam doesn’t wash out into useless spill at range.
- Scene lighting, loading, and winching. Flood beams cover the work area around the vehicle, which is exactly what you need when you’re not moving and need visibility on all sides, not down a road.
- Campsite and rear work lighting. The same wide, shallow coverage that suits a loading dock works just as well lighting a tailgate or campsite perimeter.
- Headlamp and portable-light mode switching. Multi-mode headlamps let workers flip between flood for close tasks and spot for distance without carrying two separate lights, though it’s worth checking run time on each mode since spot settings often draw more current.
Most working vehicles end up needing both patterns rather than one. The common solution is pairing a forward-facing spot or combo fixture with flood pods on the sides or rear, giving you distance up front and full coverage everywhere else.
Where should you mount and aim flood vs spot lights?
Mounting location determines whether a light actually performs to spec or just creates glare. Spot lights generally do best up high and centred, on a roof mount or bull bar, where an unobstructed line of sight lets the narrow beam do its job. Flood lights work better mounted lower, on bumper corners, A-pillars, or the bed and tailgate, aimed slightly down and outward.
- Aim spot beams just below the horizon line to avoid lighting up your own hood or the underside of tree canopies.
- Keep flood beams off the roofline where possible; a wide beam up high tends to bounce off the hood and windshield and reflect straight back into the cabin.
- Wire spot and flood circuits separately with their own switches so you control exactly which pattern is active.
- If you notice back-glare through the windshield, the fixture is almost always mounted too high or aimed too flat. Drop the mounting point or angle it down.
Pro Tip: If your flood lights are washing your own windshield instead of the ground ahead, the fix is almost never a different light; it’s usually just aiming or mounting height.
Is a combo beam a good compromise?
A combo fixture blends spot and flood optics into one housing, either through mixed lens zones or paired LED rows, giving you partial reach and partial spread from a single mounting point. The trade-off is real: a combo won’t throw as far as a dedicated spot, and it won’t spread as wide as a dedicated flood, since combining the two optics always means splitting the difference rather than maximizing either one.
- A combo makes sense when mounting space or budget only allows for one fixture and the vehicle’s tasks are genuinely mixed.
- Dedicated spot and flood fixtures make a measurable difference when either extreme, long-range visibility or full-width close coverage, is a hard requirement for the job.
How do you choose the right setup for your vehicle?
Work through this checklist before buying anything:
- Identify your primary task. Towing and highway work lean spot; scene work and loading lean flood.
- Estimate the reach you actually need. A few metres of work area calls for flood; hundreds of metres of visibility calls for spot.
- Check your mounting points. Roof and bull bar space suits spot or combo; bumper corners and pillars suit flood pods.
- Verify candela and beam angle on the spec sheet, not just lumens, before comparing fixtures.
- Wire spot and flood on separate switches if you’re running both, so you’re never lighting up more (or less) than the moment calls for.
| Vehicle role | Primary pattern | Typical mounting |
|---|---|---|
| Tow truck | Spot up front, flood on rear/sides | Roof or bull bar (spot), bumper corners (flood) |
| Farm truck | Flood dominant, spot optional | Cab roof or headache rack, tailgate |
| UTV / side-by-side | Combo or spot forward, flood rear | Front bumper or roll cage, rear rack |
| Search vehicle | Spot dominant | Roof mount, forward-facing |
For fuller guidance on matching fixtures to a specific vehicle, Strobe My Ride’s buyer guidance on choosing warning lights that work walks through fitment considerations in more depth. If you’re weighing LED output claims against older halogen fixtures while you shop, the breakdown on LED vs halogen warning lights is worth a read too. Fleets coordinating a broader vehicle upfit, including accessory work beyond lighting, can also find relevant fitment context through partners like AAA Frictions.
Where does Strobe My Ride fit into this?
Strobe My Ride is a Canadian-owned supplier stocked in Ottawa and shipped across Canada, serving tow and roadside operators, snow-removal and construction fleets, municipalities, volunteer fire departments, and commercial vehicle operators. That customer base is built almost entirely around exactly the mixed-task problem this article covers: crews that need reach on the road and coverage at the worksite.
- The catalogue distinguishes light bars, mini bars, beacons, surface mounts, hideaways, scene and work lights, and flash modules, so you’re not guessing which category fits your fixture type.
- Product-record specs, not marketing copy, determine beam pattern, mounting fitment, and rated output on every listing.
- Strobe My Ride’s scene lighting resources cover close-in flood-style illumination in more depth for readers planning a work-light setup.
- Anyone weighing a long-throw search fixture can review the Fleet Search utility light page for verified specs before deciding.
Which Strobe My Ride lights match these beam patterns?
If your vehicle needs one fixture that handles mixed work and driving duty, the Fleet Beam 120 combo beam is built around exactly that compromise: reach and spread from a single housing, for crews who don’t have mounting room for two dedicated fixtures. If your priority is long-throw visibility for highway work or search tasks, the Spot Lux 6x4 and Spot Lux 7X3 are both built around a focused, narrow-angle pattern rather than wide coverage.
Every specification claim on these pages, including beam pattern, mounting type, and rated output, comes directly from the product record itself. Check the individual spec sheet for the fixture you’re considering, or browse the full lighting collection to compare options side by side. If anything on a spec sheet is unclear for your vehicle or role, contact Strobe My Ride directly before you buy.


