


You can often restore a yellowed light bar lens for a lasting fix, but only if you remove the oxidized outer layer and reseal it with a UV-protective clear coat. A quick wash or a polish-only pass will brighten a lens for a few weeks at most. If the housing shows internal moisture, cracks, or deep crazing, restoration will not hold, and replacing the lens or assembly is the more reliable path for a working fleet vehicle.
TL;DR:
- Restoring a yellowed lens requires thorough sanding with each grit to remove scratches and deep oxidation, followed by polishing and sealing with a UV-resistant coating.
- Surface haze can be distinguished from deeper damage by cleaning tests, surface feel, internal moisture visibility, and age; deep cracks or internal moisture warrant replacement.
- Exposure to heat, UV light, road salt, and mineral deposits accelerates lens yellowing and degradation, especially in vehicles parked outdoors or performing winter routes.
- When a lens repeatedly fails restoration or shows deep cracks and internal moisture, replacing the entire assembly is more reliable for a fleet vehicle.
- Regular maintenance, including cleaning and resealing every 6 to 24 months, can extend the lifespan of light bar lenses, especially in harsh conditions like winter or prolonged outdoor exposure.
What causes light bar lens yellowing on your vehicle?
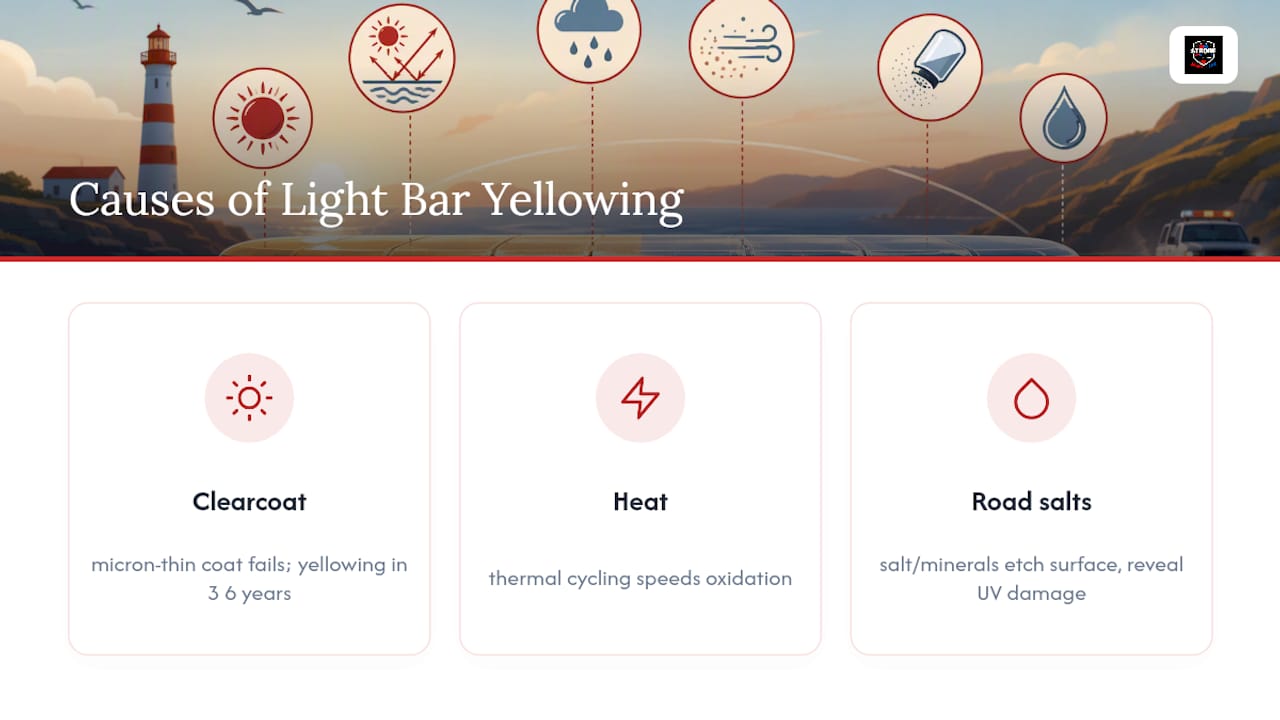
Yellowing is a chemistry problem before it’s a cosmetics problem. Most light bar lenses are polycarbonate, and manufacturers apply a factory clear coat only microns thick to block ultraviolet light. That coating is a sacrificial layer. Once UV exposure breaks it down, the polycarbonate underneath starts to oxidize and discolour on its own, a process that typically shows up somewhere between three and seven years into a lens’s service life.
Heat speeds this along. Thermal cycling from engine heat, high-output bulbs, or long days parked in direct sun alters the surface chemistry of the plastic, and research on bisphenol A polycarbonate confirms that elevated temperature and certain light exposure accelerate oxidation at the molecular level. That is why a lens mounted near a heat source, or on a vehicle that sits outdoors year round, often yellows faster than an otherwise identical unit kept in a garage.
Road chemistry adds a second layer of damage. Calcium and mineral deposits from winter brine and slush do not cause yellowing directly, but they etch and dull the surface, which makes existing UV damage more visible and traps grit against the compromised coating. Combine road salt, winter driving, and a failing clear coat, and you get the hazy, brittle-looking lens fleet operators see every spring.
How do you tell surface haze from real lens damage?
Not every cloudy lens needs the same fix. A few minutes of hands-on checking will tell you whether you’re dealing with surface oxidation or something more serious underneath.
- Wash test: clean the lens with a paint-safe soap and a microfiber cloth. If haze remains after the dirt and calcium film are gone, that residual cloudiness is oxidation, not grime.
- Fingernail test: run a fingernail lightly across the surface. Smooth haze is cosmetic; a nail that catches on ridges or pits signals crazing or deep etching that sanding may not fully resolve.
- Condensation check: look for fogging or water droplets on the inside of the lens. Moisture inside the housing points to a failed seal, not a surface issue, and no amount of polishing fixes that.
- Timeline check: if the lens is under three years old and already cloudy, something other than normal UV wear is likely at play, such as a heat source too close to the housing or a manufacturing defect in the coating.
Salt exposure, high-heat bulbs, and unshaded parking all shorten that three-to-seven-year window, so a fleet vehicle running winter routes may need attention on the earlier end of it.
How do you restore a yellowed light bar lens?
Restoration is a five-stage job: clean, sand, polish, seal, cure. Skip a stage, and the results will not last.
Supplies you’ll need:
- pH-neutral automotive soap and microfiber towels
- Wet/dry sandpaper in 800, 1500, 2000, and 3000 grit
- A spray bottle or bucket of clean water
- Plastic polish and a microfiber applicator (or a drill-mounted foam buffer for larger light bars)
- Isopropyl alcohol and lint-free wipes
- A UV-resistant clear coat sealant rated for polycarbonate
- Painter’s tape to mask surrounding paint and trim
Start by washing the lens to remove loose dirt and calcium deposits, then mask off any adjacent paint or gaskets. Wet-sand in grit order, never skipping a step: 800 grit knocks down the worst of the oxidized layer, 1500 grit removes the scratches the 800 grit left behind, 2000 grit refines further, and 3000 grit brings the surface to a near-clear finish before polishing. Keeping the surface wet throughout prevents the sandpaper from digging in and gouging the plastic. Skipping a grit is the single most common DIY mistake. It leaves scratches too deep for the next grit to erase, and they reappear as haze within weeks of finishing the job.
Once the 3000-grit pass is done, apply plastic polish by hand or with a low-speed drill buffer. Hand polishing works fine on mini light bars and smaller lenses; a buffer saves time on full-size bars but requires a light touch to avoid frictional heat buildup.
Pro Tip: Wipe the sanded, polished lens down with isopropyl alcohol before sealing. Any leftover polish residue will trap under the clear coat and cloud the finish permanently.
The UV sealant is the step that actually determines how long the job lasts. Polishing without a UV-protective topcoat produces only a temporary improvement; the bare polycarbonate has no defence against ultraviolet light and will start yellowing again within months. A properly applied clear coat, by contrast, can hold clarity for an extended period depending on sun exposure and driving conditions. Let the sealant cure fully per the product’s instructions before the vehicle goes back into service.
Expect the full job to take roughly 60 to 90 minutes per lens with a DIY kit costing about $25 to $35. A professional shop typically charges $75 to $150 per pair and applies the same UV coating step. Avoid ammonia-based glass cleaners on polycarbonate; they attack the plastic and undo the work you just did. If you’d rather leave polishing temperatures and technique to a specialist resource, Diamond Brite’s guide to polishing car glass covers safe heat limits worth knowing before you pick up a buffer.
When should you replace instead of restore a lens?
Restoration only works on surface-level oxidation. Once the damage runs deeper than the clear coat, sanding and sealing will not bring the lens back, and structural issues like internal delamination or cracking call for resealing the housing or full replacement rather than another round of polish.
Watch for these signs that a lens or the full assembly needs replacing, not restoring:
- Fogging or moisture visible inside the housing, which means the gasket or seal has failed
- Through-cracks anywhere in the lens, even hairline ones
- Pitting or crazing deep enough to catch a fingernail across multiple spots
- A lens that yellows again within a few months of a proper restoration, indicating the base plastic is too degraded to hold a coating
- Visible thinning or brittleness where the plastic flexes or chips under light pressure
For a fleet vehicle, a lens that keeps failing restoration is also a downtime problem. Every hour spent re-sanding a lens that will not hold a seal is an hour a truck isn’t on the road, and a light bar with reduced output from a degraded lens is a liability during night shifts or winter storms. At that point, a replacement lens or a new assembly is the more practical call.
How do you slow down yellowing once a lens is fixed?
A maintenance routine buys real time between restorations. Clean light bar lenses every two to four weeks during active service using a pH-neutral soap; skip anything with ammonia, since it breaks down UV coatings faster than sun exposure alone.
- Reapply a UV protectant coating every 6 to 24 months, adjusting for how much direct sun and salt the vehicle sees
- Use covered or indoor parking whenever it’s available, especially for vehicles parked outdoors year round
- Check lens clarity during every scheduled service interval, not just when someone notices haze
- Consider a protective light bar cover for vehicles that sit outside between shifts
Winter conditions deserve extra attention. Road salt combined with UV exposure wears down clear coats faster than either factor alone, which is why fleets running winter routes often see recoat needs land at the shorter end of the six-to-24-month window.
Pro Tip: Log the last reseal date for each vehicle in your maintenance records. A simple date stamp keeps you from guessing whether a hazy lens needs a quick clean or a full restoration.
When should you contact Strobe My Ride about a light bar lens?
Strobe My Ride is a Canadian-owned supplier stocked in Ottawa, shipping light bars, mini light bars, beacons, and scene and work lights to fleets across the country. When a lens shows internal moisture, repeated restoration failures, or structural damage a sealant cannot fix, replacement is usually the better use of your time than another round of sanding.
- Reach out if you’re unsure whether your light bar, mini bar, or work light needs a lens repair or a full assembly swap
- Contact Strobe My Ride for SKU or fitment guidance before ordering a replacement for your specific vehicle setup
- Ask about compatible replacement options if a restored lens keeps failing within months rather than years
If you’re weighing your options on the right style of light bar for your vehicle, our guide to choosing a light bar breaks down the differences between full-size bars, mini bars, and other formats before you commit to a purchase.
Replacement and upgrade options worth considering
Sometimes the smarter move isn’t another restoration cycle. If a lens has failed twice, if the housing shows structural wear, or if you’re already looking to upgrade output while you’re in there anyway, a new assembly resets the clock without the guesswork of judging how much oxidized plastic is left to work with.
Strobe My Ride carries several options worth a look depending on your vehicle and mounting needs. The Patrol Beam Dual Force Quad is a full-size off-road LED lightbar suited to trucks that need a durable, high-visibility replacement. The Patrol Bar Quad 50 Slim w/ STT offers a slimmer full-size profile for operators who want less bulk without giving up bar length. For tighter mounting spots or compact vehicles, the Patrol Bar Quad 24 mini lightbar is available in multiple colour configurations for fleets that need a smaller footprint.
If you’re not sure which of these fits your vehicle, or whether your current mounting hardware will work with a replacement bar, contact Strobe My Ride directly for fitment guidance before you order.
Sources
For deeper technical background on polycarbonate degradation and restoration technique, see the thermal oxidation study on bisphenol A polycarbonate and the headlight restoration cost and time guide referenced throughout this article.
- UV damage on acrylic windows: Prevention & restoration
- How to clean headlights
- Thermal degradation and surface oxidation of bisphenol A polycarbonate plates
FAQ
Why does my LED light bar lens look yellow?
The factory UV coating on the lens has broken down from sun exposure and heat, letting the polycarbonate underneath oxidize. Road salt and mineral deposits often make the haze more noticeable but aren’t the root cause.
Do LED lights cause yellowing?
The LEDs themselves don’t cause yellowing, but heat from high-output bulbs or tightly sealed housings can accelerate the thermal oxidation that leads to it. Ventilation and lens placement relative to heat sources both matter.
How do I fix discoloured LED light bar lenses?
Wet-sand through a grit progression, polish the surface, and apply a UV-resistant clear coat sealant; skipping the sealant means the yellowing returns within months. If the lens has internal moisture or cracks, restoration won’t hold, and replacement is the better option.
Can a yellowed lens turn white again after restoration?
A properly restored lens should return close to its original clarity, though it won’t necessarily match a brand-new lens exactly. A UV topcoat can maintain that clarity for one to three years, while a polish-only job without sealant fades back to haze in a matter of weeks.


