


Vehicle lighting troubleshooting is the systematic process of inspecting, testing, and repairing a vehicle’s electrical and optical components to restore proper light output and maintain compliance with Canadian safety standards. Lighting defects account for 22% of all vehicle defects flagged during MTO roadside inspections in Ontario, making them the second most common cause of inspection failure after brake defects. Whether you operate a tow truck, a fleet vehicle, or a personal car, understanding the root causes of car light issues and how to fix them correctly keeps you safe, legal, and moving. These vehicle lighting troubleshooting tips cover everything from blown bulbs to CMVSS 108 compliance.
What are the most common causes of vehicle lighting problems?
Most vehicle lighting issues are misdiagnosed as simple blown bulbs. The root cause is often electrical degradation from corrosion, poor contacts, or damaged wiring rather than bulb failure alone. Identifying the actual source of the fault saves time and prevents repeat failures.
Blown or burned-out bulbs
A burned-out bulb is the most obvious cause of a dead light, but it is rarely the whole story. If a replacement bulb fails within days, the socket or wiring circuit has an underlying problem. Always inspect the socket for discolouration, melted plastic, or corrosion before installing a new bulb.
Corrosion from road salt and brine
Canadian winters are particularly hard on vehicle wiring. Road salt and brine cause corrosion that wicks up wire insulation, forming copper oxide that increases electrical resistance. The result is dim lights or intermittent failures even when the wiring appears intact from the outside.
Lens hazing and yellowing
Hazed or yellowed lens covers scatter light rather than projecting it forward. Hazy lenses cause failures in intensity tests even when the bulb itself is fully functional. Lens restoration or replacement is as important as bulb replacement for passing inspections in Ontario, British Columbia, and Quebec.
Aftermarket HID and LED retrofit bulbs
Installing aftermarket HID or LED bulbs into halogen housings is a common modification that creates real problems. These retrofits violate CMVSS 108 because the housing optics are not designed for the different light source, producing glare and uneven beam patterns. This is the most common cause of inspection failure on modified vehicles in Canada.
Electrical faults and loose grounds
A loose or corroded ground connection causes more lighting failures than most vehicle owners realism. Body control modules detect voltage deviations caused by resistance and flag exterior light errors on the dashboard. A light that appears to work visually can still trigger a fault code if the circuit resistance is too high.
- Blown bulbs: Check the socket and circuit before replacing.
- Corroded connectors: Look for green or white residue at plug terminals.
- Hazed lenses: Test light output, not just bulb condition.
- Illegal retrofits: Aftermarket HID/LED in halogen housings fail CMVSS 108.
- Loose grounds: A bad ground causes dim lights and false fault codes.
Pro Tip: Apply dielectric grease to every bulb socket and connector during reassembly. It blocks moisture ingress and prevents the copper oxide buildup that causes resistance faults over a Canadian winter.
How to systematically diagnose vehicle lighting issues
A structured diagnostic approach prevents wasted parts and repeat visits to the shop. Start simple, then work toward the more complex electrical checks.
-
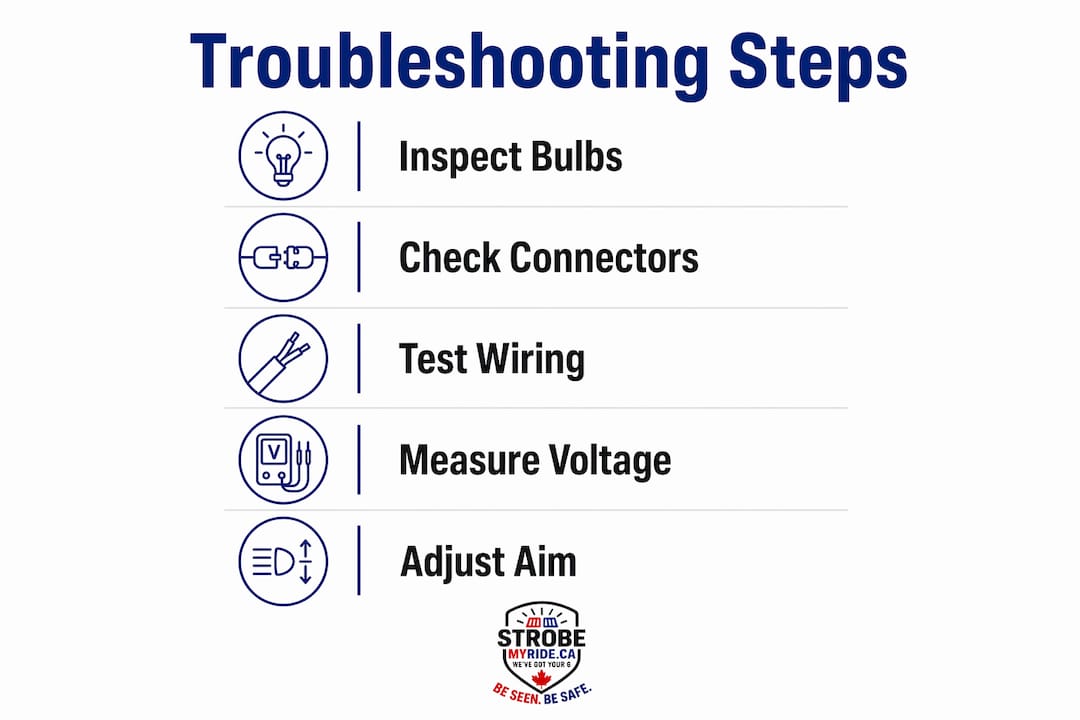
Check the bulb first. Remove the bulb and inspect the filament visually. For LED assemblies, look for dark spots or cracked lenses. Swap in a known-good bulb to confirm whether the bulb is the fault.
-
Inspect and test the fuse. Locate the relevant fuse in the fuse box using the owner’s manual. A blown fuse points to an overload or short circuit somewhere in that circuit. Replace the fuse, then monitor whether it blows again immediately.
-
Inspect connectors for corrosion. Unplug the connector at the bulb socket and at any inline connectors. Look for green or white oxidation on the terminals. Clean corroded terminals with electrical contact cleaner and a small wire brush before reconnecting.
-
Test wiring harness continuity. Use a multimeter set to continuity mode. Probe from the bulb socket back to the fuse box to confirm the wire is intact. A break in continuity confirms a damaged or severed wire.
-
Perform voltage drop testing. This is the step most DIY diagnostics skip. Voltage drop testing detects high-resistance points caused by hidden corrosion or loose pins better than continuity tests alone. Set your multimeter to DC voltage, connect the positive probe to the power side of the circuit and the negative probe to the load side, and measure the drop under load. A drop greater than 0.5 volts on a 12-volt circuit indicates a resistance problem.
-
Check the body control module for fault codes. Modern vehicle lighting systems are monitored by body control modules using voltage and current metrics. Faults often trigger dashboard warnings even when the visible light appears operational. An OBD-II scan tool or a shop-grade scanner reads these codes and points you to the specific circuit.
Pro Tip: Voltage drop testing is a pro-level technique that reveals faults invisible to a standard continuity check. A wire can pass continuity but still have enough resistance to dim a headlight by 30%. Always test under load, not just at rest.
| Diagnostic step | Tool required | What it detects |
|---|---|---|
| Bulb inspection | Visual or swap test | Burned filament, cracked LED |
| Fuse test | Multimeter or fuse puller | Overload, short circuit |
| Connector inspection | Contact cleaner, wire brush | Corrosion, loose terminals |
| Continuity test | Multimeter | Broken or severed wire |
| Voltage drop test | Multimeter (DC voltage) | Hidden resistance, dim lights |
| Fault code scan | OBD-II scanner | Body control module errors |
How do Canadian regulations affect vehicle lighting repairs?
Canadian vehicle lighting law operates at two levels: federal and provincial. Transport Canada’s CMVSS 108 sets the baseline standard for all lighting equipment sold and installed on vehicles in Canada. Provincial programmes, such as Ontario’s MTO Level I roadside inspection, enforce these standards at the roadside and at licensed inspection stations.
What CMVSS 108 requires
CMVSS 108 specifies minimum candela output, beam pattern geometry, and photometric performance for headlights, tail lights, brake lights, and turn signals. A replacement bulb or assembly must meet these specifications. An aftermarket HID or LED bulb dropped into a halogen housing does not meet CMVSS 108 because the housing reflector and lens optics are calibrated for a specific light source position and output. Factory-style LED assembly replacements that are engineered for the housing are the compliant path forward, though costs range from $800 to $3,500 CAD per side depending on the vehicle.
Provincial inspection priorities
- Ontario MTO Level I: Inspectors check that all required lights are present, functional, and correctly coloured. Lighting defects account for 22% of inspection failures, placing lighting second only to brake defects at 28%.
- British Columbia: CVSE inspections include headlight aim checks and intensity verification. Hazed lenses that reduce output below the minimum threshold result in a defect order.
- Quebec: SAAQ vehicle inspections require all lighting to match OEM specifications. Aftermarket retrofits that alter beam pattern or colour are grounds for rejection.
Headlight aiming standards
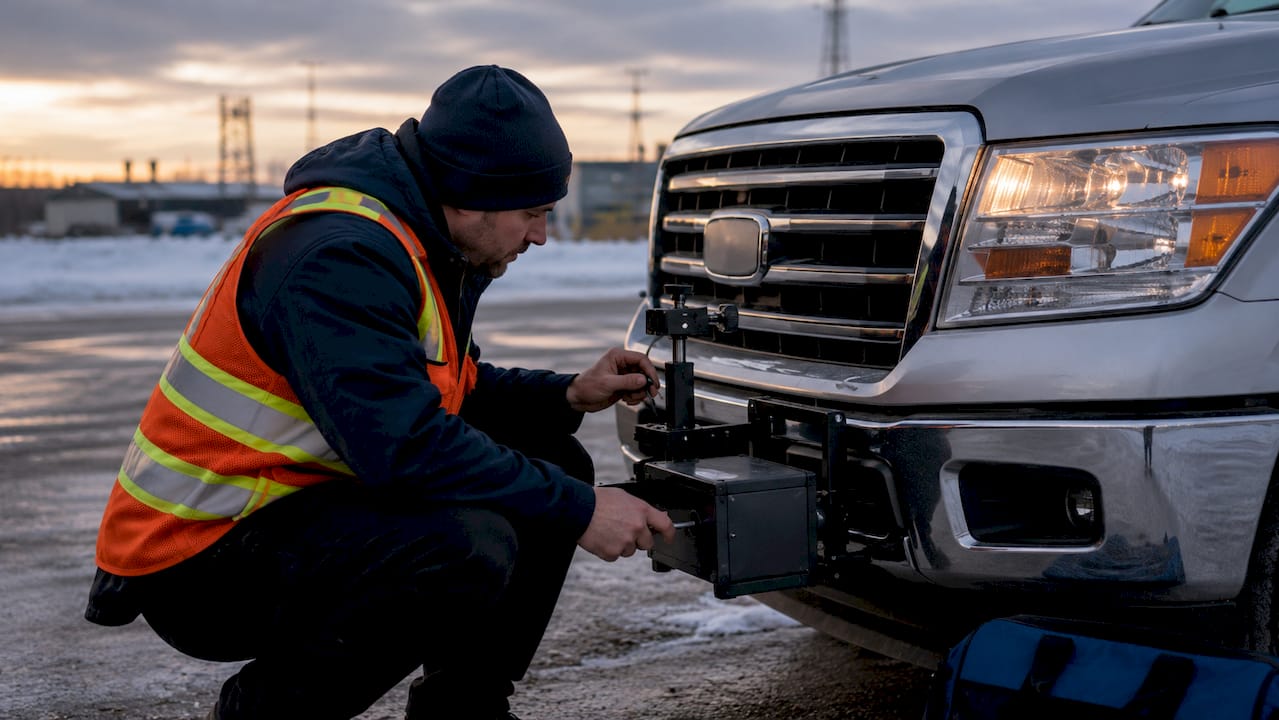
Headlight aim is a frequently overlooked compliance issue. A headlight that is aimed too high blinds oncoming drivers. One aimed too low reduces your visibility range. Most provincial inspection programmes require headlights to be aimed within a specified vertical and horizontal tolerance measured at a set distance from a flat wall. If you have replaced a headlight assembly, always verify aim with a headlight aiming tool or have a licensed shop confirm it.
Legal risks of non-compliant modifications
Running non-compliant lighting is not just an inspection risk. Under provincial highway traffic acts, an officer can issue a defect notice or fine for lighting that does not meet the required standard. For fleet operators, a lighting defect on a commercial vehicle can result in an out-of-service order under the National Safety Code. Reviewing your fleet lighting compliance requirements before modifying any vehicle is the correct order of operations.
Pro Tip: Before any lighting modification on a commercial vehicle, confirm the replacement assembly carries the appropriate SAE or DOT certification markings. These markings indicate the product was tested to the relevant photometric standard and provide a paper trail for compliance audits.
What are the best practices for repairing and maintaining vehicle lighting?
Correct repair technique determines whether a fix lasts one season or five years. The Canadian environment, with its road salt, freeze-thaw cycles, and temperature extremes, accelerates every failure mode in vehicle wiring and lighting assemblies.
Use heat-shrink crimp connectors, not scotch locks
A ratcheting crimper with heat-shrink insulation creates a more durable, moisture-resistant wiring repair than solder in high-vibration areas under the hood. Solder joints become rigid and can snap at the edge of the joint due to constant vibration. Scotch lock connectors, the quick-splice type that pierce the wire insulation, trap moisture and corrode rapidly. Use heat-shrink crimp connectors for every splice under the hood or in the wheel well.
Apply dielectric grease to every connector
Dielectric grease is a non-conductive silicone compound that blocks moisture from entering electrical connectors. Apply a small amount to the inside of every bulb socket and multi-pin connector during reassembly. This single step prevents the copper oxide formation that causes resistance faults and dim lights over time.
Restore or replace hazed lenses
Lens restoration kits using wet-sanding and UV-resistant clear coat can recover a hazed lens to near-original clarity. The process works well for moderate hazing. Severely cracked or deeply yellowed lenses require full assembly replacement. Lens clarity is a compliance issue, not just an aesthetic one. A restored lens that passes a visual inspection may still fail a photometric intensity test if the hazing is too deep.
Test all lighting functions regularly
- Daytime running lights (DRLs): DRLs often illuminate only the front of the vehicle, leaving rear lights off at night. Drivers who rely on DRLs and forget to switch on their full headlights create a rear visibility hazard.
- Brake lights: Have a second person confirm all three brake lights activate when the pedal is pressed.
- Turn signals: Check front, rear, and side repeaters. A fast-flashing indicator usually means one bulb in that circuit has failed.
- Reverse lights: Confirm both reverse lights illuminate when the transmission is in reverse.
- Marker and clearance lights: On trucks and trailers, check every marker light along the roofline and sides.
Pro Tip: Test your full lighting system after any collision repair, suspension work, or trailer hitch installation. These jobs frequently disturb wiring harnesses and connectors in the rear of the vehicle, causing lighting faults that only appear days later.
Avoid temporary fixes
Electrical tape over a bare wire is not a repair. It holds moisture against the copper and accelerates corrosion. Zip-tying a loose connector so it makes intermittent contact is not a repair either. Every temporary fix becomes a diagnostic puzzle six months later. Do the job correctly the first time with proper connectors, proper crimps, and proper sealing.
For vehicles that require purpose-built lighting solutions, such as work trucks, tow vehicles, and construction equipment, the vehicle emergency lights compliance guide from Strobe My Ride covers installation and maintenance standards specific to Canadian-regulated vehicles.
Strobe My Ride: lighting solutions built for Canadian conditions
When troubleshooting reveals that a lighting assembly is beyond repair or simply not fit for the demands of the job, the right replacement makes a measurable difference in visibility and compliance.
Strobe My Ride supplies high-output LED work lights, warning lights, and surface-mount systems built for Canadian fleet and commercial vehicle operators. Products like the Fleet Beam 120 LED work light and the Noxsolis NX514 LED work light are engineered for high-vibration, all-weather environments where standard automotive lighting fails. Every product ships from Canada with fast delivery and is backed by expert support from a team that understands Canadian inspection and compliance requirements. If your current lighting is creating repeat troubleshooting headaches, upgrading to purpose-built LED assemblies eliminates the root cause rather than treating the symptom.
FAQ
What causes headlights to dim without a blown bulb?
Dim headlights without a blown bulb are most often caused by high resistance in the circuit from corroded connectors, a weak ground connection, or copper oxide buildup in the wiring. Voltage drop testing identifies the exact location of the resistance.
Are aftermarket LED bulbs legal in Canada?
Aftermarket LED bulbs installed in halogen housings do not comply with CMVSS 108 and are the most common cause of inspection failure on modified vehicles. Compliant LED upgrades use purpose-built assemblies designed for the specific housing optics.
How often should I test all vehicle lights?
Test all lighting functions, including DRLs, brake lights, turn signals, and reverse lights, at least once a month and after any collision repair, suspension work, or trailer connection. DRLs in particular can create a false sense of security because they do not activate rear lights automatically.
What is voltage drop testing and why does it matter?
Voltage drop testing measures electrical resistance in a live circuit by comparing voltage at the source and at the load. A drop greater than 0.5 volts on a 12-volt circuit indicates hidden resistance that causes dim lights and intermittent faults that a standard continuity test will not detect.
What lighting defects cause MTO inspection failures most often?
Lighting defects account for 22% of all vehicle defects flagged during MTO roadside inspections in Ontario. The most common lighting failures are non-functional bulbs, non-compliant aftermarket retrofits, hazed lenses that fail intensity tests, and incorrectly aimed headlights.
Key takeaways
Effective vehicle lighting troubleshooting requires checking bulbs, connectors, wiring resistance, and lens condition in sequence, then confirming all repairs meet CMVSS 108 and provincial inspection standards.
| Point | Details |
|---|---|
| Corrosion is the hidden cause | Road salt creates copper oxide in wiring, causing resistance faults that look like bulb failures. |
| Voltage drop testing is essential | A continuity test alone misses high-resistance faults; test under load with a multimeter. |
| Lens condition affects compliance | Hazed lenses fail intensity tests even with a functional bulb; restore or replace them. |
| Aftermarket retrofits violate CMVSS 108 | LED or HID bulbs in halogen housings are non-compliant and cause inspection failures in Canada. |
| Test all lights regularly | DRLs, brake lights, turn signals, and marker lights should be verified monthly and after any repair work. |
Recommended
- Vehicle Emergency Lights: Canada Compliance and Install Guide | Strobe My Ride – Strobe My Ride
- Fleet Lighting Compliance Guide for Canada | Strobe My Ride – Strobe My Ride
- Vehicle emergency lighting installation near me: 2026 guide | Strobe My Ride – Strobe My Ride
- Fleet Warning Light Buying Guide for Canada | Strobe My Ride – Strobe My Ride


